Visit my Website

Tuesday, July 27, 2021

Three Cheers for the Red White and Blue


Three Cheers

I always seem to start a seasonal quilt in whichever season it happens to be, even though I know it won't be ready to enjoy this year, but I'll be WAY ahead for next year!  This Three Cheers quilt will be good for the entire summer season!  I used the Crazy Ohio Star block found in the Half Crazy book.  Because the stacking and cutting are a bit different than directed in the book, which stacks and shuffles for only 3 fabrics per block, here's a quick how-to for the stacking and shuffling.


Because these blocks are totally  scrappy, with a different fabric in each position, the fabric must be stacked and cut in two piles, one with all lights, and one with the darks (reds and blues).  As you stack have contrast from one fabric to the next mixing up color, scale, plaids, stripes and prints. To the left is an example of how I stacked my fabric. Yardage packs with these fabric are available HERE

Remember, you need one fabric for each block required.  This quilt is 5 x 5 = 25 blocks but you must have equal numbers of lights and darks so 13 lights and 13 darks are required which gives you an extra block as a label on the back!  You can get one of these blocks per fat quarter, or you can get 3 blocks across the width of a half yard is you'd like to make it bigger.


TRACE the pattern onto freezer paper onto freezer paper as directed, iron a template onto each stack of fabrics, and cut the pattern out of each stack as directed.   


TRADE the star pieces, A2, A3, A4, B2, B3, C2, C3, D2 and D3, placing the light stars in the dark stack and the dark stars in the light stack.  

SHUFFLE so that you have a different fabric in each position. I usually shuffle all the lights first and them repeat for all the darks so that I can keep track of what I'm doing, but if this is your first time shuffling, here is a suggested shuffling pattern:

A.  For pieces A1 and A2,  put the top fabric on the bottom of each of these piles.


B.  For pieces B1 and B2,  put the top TWO fabrics on the bottom of each of these piles.

C.  For pieces B3 and B4, put the top THREE fabrics on the bottom of each of these piles.

D.  For pieces C1 and C2, put the top FOUR fabrics on the bottom of each of these piles.

E.  For pieces C3 and C4,  put the top FIVE fabrics on the bottom of each of these piles.

F.  For pieces D1 and D2,  put the top SIX fabrics on the bottom of each of these piles.

G.  For pieces D3 and D4,  put the top SEVEN fabrics on the bottom of each of these piles.

H.  For piece A3,  put the top EIGHT fabrics on the bottom of each of these piles.

I.  Pieces A4 and D5 are now different than the rest and can remain the same.


PIECE the blocks as directed on page 19 for the Happily So quilt in the book.


Layout the blocks in a checkerboard as shown in the top photo, or here is an alternate layout you might like. 


I chose to use the leftover portion of my fat quarters to add 2" scrappy red, white and blue borders as shown in the top photo.  Please note that you probably won't have enough of the red and blue to get all the way around and will need to add to the leftovers.  


Then I took it one step further and added a red, white, and blue bias binding (again you won't bet the binding out of the leftovers and will need to purchase additional fabric).  Here's how: cut 2.5" strips and stitch in a strip set as shown. Cut 2.5" bias strips for the binding.


And here's one last photo of the backing (photo bomb by Frank) with the extra block used as a label. This one's definitely worth  Three Cheers! Enjoy!

Janet


Thursday, February 25, 2021

Scrap Happy


Hi Everyone!  I know it's been a very long time, but thought I check in here and let you know what's new here at One Sister!  I have two new fabric lines from Henry Glass that have just delivered, Scrap Happy and Linen Closet 2.  These two lines were designed in conjunction with and to support my One Crazy Sister Club 3 projects.  These projects will be available at your local quilt shop, but if you don't have access to a club, I will have kits available on my website.  Here's a bit of a sneak peak of the projects that are coming up!   


This fun quilt is Topsy- Turvey...notice in the first photo how it can be combined with the Monkey Wrench quilt block (shown draped on the table) to create a spectacular Spinning Tops quilt, hanging on the dresser!  This is one of my favorite ways to combine the different small quilt blocks into one spectacular quilt!


This super cute Happy Dash two-colored churndash may be pint sized, but it makes a big splash!  I just love the scrappiness of these blocks!


Another two-color quilt is this funky Barn Raising variation!  It would also be so cute as a totally scrappy quilt, and you can play around with the block settings for even more variety!


This last quilt I will share today is Card trick, a block that only looks difficult.  This one is a winner for sure!  For more on my crazy piecing technique, see the demos on my website, or follow me on Instagram @ones1ster for view technique videos on my IGTV channel!  

Thanks for stopping by and catching up with what's happening here with me.  Hope you all are keeping busy, staying healthy and happy! 

Until next time,  

Keep piecing like crazy, 
Janet

Friday, July 19, 2019

Easiest Quilt Ever!

I have long admired the work of Yoko Saito, both her quilt and fabric designs, and I was so excited she  designed this panel that I could turn into a quick and beautiful quilt!  It does require two panel pieces so that you can get all four border pieces.


Here's what I did:  Carefully cut the floral borders away from the center squares.  Cut the four floral borders to 7" wide, removing the selvages (Note:  I do typically remove a bit more generous portion of the selvage, but I didn't want to loose the flower stems in the seam allowance.). Add a 2" strip of contrasting green inner border to the top of each of the four floral borders, then add to each side of the center.  


Fussy cut four 8-1/2" corners from the remaining center panel, and stitch to each side the the two remaining borders. Then add to the center as shown in the photos below.  Add a 5" plaid outer border to complete the quilt top.


Quilt as desired, and presto!  A beautiful quilt for you to enjoy!  If you are interested in purchasing a kit for this quilt, you can find them HERE.  A blue option is also available.  
Easy, quick and beautiful!  
Enjoy!
Janet


Friday, June 14, 2019

Good Vibes Only Blog Tour

Today is my day to share my project with you on the Good Vibes Only Blog Tour, hosted by Shayla Wolf of Sassafras Lane Designs.  Shayla is the designer of this bright and sunny line from Windham Fabrics that is sure to make you smile!  I'm so happy to be a part of this tour and to spend a bit a time with you! 


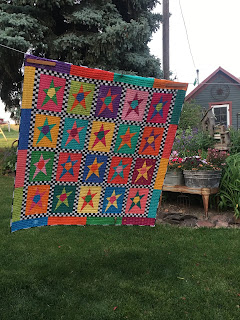
For those of you who don't know me, I have a crazy piecing method that's fast fun and fabulous, that I first used when I designed as Buggy Barn, and which I now continue as One Sister.  It's a stack, cut, shuffle, and piece-it-all-back-together method and is lots of fun!  And I do have demos on my homepage: just hover over the DEMO tab and click to select which demo you'd like to view.  (Any of my books with "Crazy" in the title uses this method of piecing). I selected this Sew Crazy Stars block from the Crazy Favorite Things book and I think it's a great way to showcase Shayla's Good Vibes Only fabric!  I added a black and white checkerboard sashing and binding that just makes those blocks pop! Some serious good vibes :-)


A candy cane binding is a fun way to finish a quilt, whether its a red and white striped binding for Christmas, or this fun black and white combo!  And its a snap to make!  Here's how I do it:  

1.  Cut 2-1/2" strips of your two color choices.
2. Stitch the strips together lengthwise, alternating colors, black, white, black, white to make a strip set with about 8 strips.  
3.  Cut your bias binding strips as shown below:


I hope you're having as much fun on this tour as I am! And the fun continues so just check out the schedule below and click on the links for each day and it'll be Good Vibes Only coming your way!  I have to share that Shayla's grandma, MaryEllen is a good friend and it's been so much fun to see how successful Shayla has been, first as a pattern designer, and now as a fabric designer! So congratulations Shayla, and keep up the great work! 

Windham Fabrics has graciously offered some fat quarters for give-aways and I will add my Crazy Favorite Things book!  The giveaway is open until 12am CST on June 24, 2019, and is open to US residents only.  Void where prohibited by law.  Just comment below for a chance to win!  

Thanks much for stopping by!  
Hope to see you again soon! 
Janet


Monday, June 3rd: Shayla Wolf | Sassafras Lane Designs
Tuesday, June 4th: Emily Dennis | Quilty Love
Wednesday, June 5th: Nichole Vogelsinger | Wild Boho
Thursday, June 6th: Irene Sytema | Sugaridoo
Friday, June 7th: Sylvia Schaefer | Flying Parrot Quilts
Saturday, June 8th: Robin Long | Robin Ruth Design
Sunday, June 9th: Jessica VanDenburgh | Sew Many Creations
Monday, June 10th: Nicole Young | Lillyella
Tuesday, June 11th: Sherry Shish Powered by Quilting
Wednesday, June 12th: Tara Curtis | Wefty Needle
Thursday, June 13th: Jo Westfoot | The Crafty Nomad
Friday, June 14th: Janet Nesbitt | One Sister Designs
Saturday, June 15th: Natalie Barnes | Beyond the Reef
Sunday, June 16th: Elisabeth Hardy | Elisabew Quilts
Monday, June 17th: Sarah Sharp | No Hats in the House
Tuesday, June 18th: Joanne Hart Unicorn Harts
Wednesday, June 19th: Elise Baek | Elise & Emelie
Thursday, June 20th: Kaitlyn Howell | Knot and Thread Design
Friday, June 21st: Nicole Daksiewicz | Modern Handcraft
Saturday, June 22nd: Sarah Thomas | Sariditty
Sunday, June 23rd: Shayla Wolf | Recap


Friday, June 7, 2019

Needle Turn Applilque

Ah, Summer!  Time to enjoy those lazy, crazy, sunny days, and for me, it means picking up some applique to take along with me!  This is a picture of Crazy Peels, which will be included in my next book, Drive Me Crazy.  The background is all crazy pieced, with orange peels appliqued on top.  

When I applique, I like to use the needle turn method.  I use freezer paper to transfer the motif to the right side of my fabric, then I turn the line under and stitch.  It is the same stitch you use to stitch down your binding, if you stitch it by hand.  I've always said "If you can bind, you can applique!"  Here is a quick video of how I stitch and what I do at points.  If you'd like more tools, tips, and how-tos, my old applique videos are still up on You-Tube at the following links:

Needle turn applique supplies: 
https://www.youtube.com/watch?v=J0J-jjb7gfM

Needle turn applique prep: 
https://www.youtube.com/watch?v=BtY4O4rREVA

Needle turn applique technique & tips: 
https://www.youtube.com/watch?v=SYEzDwZK7GI

My high school son was using a camcorder without a tripod, so you may get a bit sea-sick as you watch, but there is TONS of great info in these videos.  Enjoy!

Wednesday, June 5, 2019

Crazy Good Life


My Crazy Good Life Quilt if back from the quilter and I just love it!  Made using my Itty Bitty Fabric line from Henry Glass & Co, this quilt is the finale quilt from this year's One Crazy Sister Club: each month, you make one small project and at the end of the seven months, you can use your extra blocks to make this Crazy Good Life quilt!  Full of affirmations, this is a crazy good quilt!  It's not too late to join the club, and join the fun!  Just visit my site to purchase your kits and let the crazy good times roll! 
Happiness Is kit

Happy Fall Kit

Log Cabin Hearts

Dash for the Stars

Sunny Skies

It's a Dog's Life

Laugh Bloom Grow

Follow me on Instagram @ones1ster

Good Vibes Only Blog Tour

June signals the start of those lazy crazy days of summer, full of sun, fun, and good vibes!  And for some quilty good vibes, the girls at Sassafras Lane are hosting a Good Vibes Only blog hop!  Below are the scheduled days, and notice my day if Flag Day, June 14!  I will share more of my quilt then!  Until then, enjoy the fun and be sure to catch up will all of these talented designers!  


Monday, June 3rd: Shayla Wolf | Sassafras Lane Designs
Tuesday, June 4th: Emily Dennis | Quilty Love
Wednesday, June 5th: Nichole Vogelsinger | Wild Boho
Thursday, June 6th: Irene Sytema | Sugaridoo
Friday, June 7th: Sylvia Schaefer | Flying Parrot Quilts
Saturday, June 8th: Robin Long | Robin Ruth Design
Sunday, June 9th: Jessica VanDenburgh | Sew Many Creations
Monday, June 10th: Nicole Young | Lillyella
Tuesday, June 11th: Sherry Shish Powered by Quilting
Wednesday, June 12th: Tara Curtis | Wefty Needle
Thursday, June 13th: Jo Westfoot | The Crafty Nomad
Friday, June 14th: Janet Nesbitt | One Sister Designs              
Saturday, June 15th: Natalie Barnes | Beyond the Reef
Sunday, June 16th: Elisabeth Hardy | Elisabew Quilts
Monday, June 17th: Sarah Sharp | No Hats in the House
Tuesday, June 18th: Joanne Hart Unicorn Harts
Wednesday, June 19th: Elise Baek | Elise & Emelie
Thursday, June 20th: Kaitlyn Howell | Knot and Thread Design
Friday, June 21st: Nicole Daksiewicz | Modern Handcraft
Saturday, June 22nd: Sarah Thomas | Sariditty
Sunday, June 23rd: Shayla Wolf | Recap